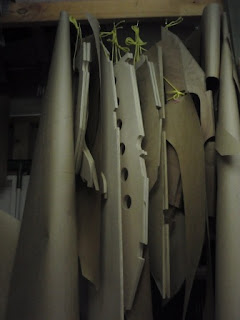


Ok here goes...I arrived home with three lengths of RS 250 x 60 x 5700 Fijian Kauri (Agathis) and two lengths of 150 x 50 x 3000 Kwila. As these were loaded by a fork hoist, I had no idea just how heavy they were until I got home and had to offload them from my roof carrier alone. The Kwila in particular was far from light and I realised that I probably pushed the roof carrier to the limit! The following day I got stuck into ripping them down and discovered that the first plank had some substantial residial stresses which resulted in bowed timber when ripped. Although workable and satisfactory for shorter lengths, the second plank would not be good enough for stringers and had a knot in it midway along so I returned it to the yard where it was exchanged for a clear piece and an extra 300mm of length for my troubles. I drooled over the piles of exotic hardwoods and imported lumber in the massive shed. Some of the ripping was done on a table saw which consists of a piece of ply bolted onto an old cast iron sewing stand with an old skill saw mounted from below and an aluminium angle fence held in position by two G clamps. This worked ok but was a bit dodgy over the portable infeed and outfeed roller stands and I remembered seeing Wilfried Vermeiren's blog which showed how he used his skill saw to rip his stringers and opted to do the rest of the planks that way so the 6m stringers were ripped using the skill saw and a fence on the building jig. Sizing was done with the help of a friend by passing them through my brothers Ryobi buzzer. I like that tool!!! All up I collected five large bags of shavings and sawdust for the chookhouse. The stringers are now bundled and ready to go but having read the horror stories posted by those of you who have had the experience of snapping stringers, I am dreading the day I take them down to use them because I did not get any spares from the process. I will look carefully at my options for softening these nearer the time. I made a small epoxy mixing balance based on the description offered by Joe Tribulato which is very simple to use and is especially useful for mixing very small amounts of epoxy (less than one pump from the West System dipensers) and also for the Resorcinol glue that I am using for laminating and bonding the Kwila. John was most helpful on this topic as Kwila has a lot of resins that leech out continiously making bonding difficult. Freshly planed timber, cleaned with MEK (Methyl Ethyl Ketone) and bonded immediately with Resorcinol is apparently ok. All the frames have been cut and so far I have finished the stem and frames 1, 2 & 6 ready for standing-up. When I lofted the plans and cut the templates, I made a small error on frame 2 that resulted in a slight camber in the bottom profile of the cross piece where it is in fact flat. This had to be corrected by adding a second layer of 12mm ply (I used 12mm insted of 9mm due to the size of the frame for the cross piece) and some epoxy filler. I am now satisfied that neither strength nor appearance has been compromised and I can move on. The 9mm and 12mm plywood I purchased was marine bonded and "boil proof" but is not BS1088 rated. There are some voids in this that will worry me when I start planking and I am going to try and get a credit for those sheets and by BS1088 Gaboon Ply for the palnking and decking. I have raised the height of the building jig temporarily using two lengths of framing timber to save my back during cutting of the ply - this has made a huge difference and if I did it again, I would raise it even more to reduce bending and back strain during this phase. I was also glad that the jig was still moveable to give me flexibility during this phase of the build. It gets pushed around quite a bit to suit the activities of the day. I have also raised the middle and aft bunk flat at the sides by 8mm to assist drainage towards the thru-compartment drains alongside the centrecase when the boat is beached, at anchor or on the trailer. The centreboard lamelles came out slightly thinner (50mm) than the plans but I am not concerned about this and will reinforce the foil with glass later. The case will remain 70mm in width internally and I have designed a pivot pin and Vesconite bush arrangement based on Johns design that will compensate for the reduced thickness of the centreboard. Now progress has been tremendously good thanks to the fact that I am currently unemployed. The plan was that I would budget for enough materials to get started and once employed again, I would be awash with cash for boats and stuff...ha ha! It looks like building will grind to a halt sooner than expected but at least I have enough epoxy and materials to get the boat to the planking stage. Anyway, that's it for now. Lastly, if you guys could please assist me with a decent template for the blog or teach me how to arrange the photos, that would be great. I seem to spend more time arranging the bloody thing to look presentable than typing while in fact I should be making wood shavings and curing epoxy! Somehow the sequence of the photos and where they place themselves appears to be either ad-hoc or non-negotiable.